The Lemosho route is considered the most scenic route in Kilimanjaro, offering panoramic views of different sides of the mountain. As one of the newest routes, Lemosho is a superb choice for your climb. It is our favorite route because of its ideal balance of low crowds, beautiful scenery, and a high summit success rate. Kiwoito Africa Safaris specializes in guiding the Lemosho route. Most of our clients climb Kilimanjaro via this route and they consistently tell us that they love it. The Lemosho route is therefore highly recommended. The route approaches Mount Kilimanjaro from the west, starting with a long drive from Moshi to Londorossi Gate. From there, the first two days are spent trekking through the rainforest to Shira Ridge. The Lemosho route crosses the entire Shira Plateau from west to east in a pleasant and relatively flat trek. There are few crowds until the route joins the Machame route near Lava Tower. The route then passes under the southern ice field of Kilimanjaro on a path known as the Southern Circuit before reaching the summit at Barafu. The descent is via the Mweka route.
Day by day
Day 1: Lemosho Glades (2385M) to Big Tree camp (2780M)
Around 8:00 am you will be transferred to the Lemosho gate located on the western side of Kilimanjaro. After the registration process, you will still start your climb steadily through the forests of the Lemosho glades to reach the Big Tree camp where you will be spending the night.
Day 2: Big Tree Camp (2780m) to Shira 1 Camp (3500m)
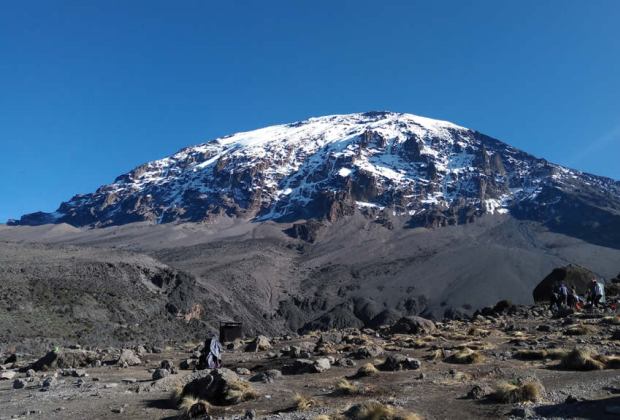
Today you will trek across a plateau of grassy moorland and heather scattered with volcanic rock formations. Our destination for today is the Shira 1 Camp from where there are often views of Kibo Peak floating on the clouds. We gain a reasonable amount of altitude today and parts of the route are fairly steep.
Day 3: Shira 1 Camp (3500M) to Shira 2 Camp (3900M )
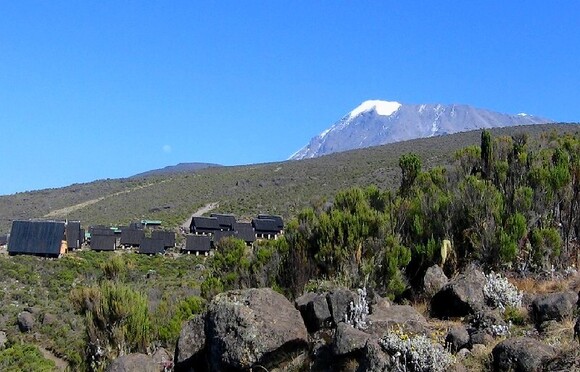
Today you will get the chance to view the northern ice fields from the western side of the mountain with some unusual views of Kibo. Our steady climb across the moorland of the Shira plateau will help with acclimatization and we enjoy great panoramic views. Our destination today is the Shira 2 camp. In the afternoon you will take an acclimatization walk then head back to camp for dinner and overnight.
Day 4: Kibo Hut ~ Pic Uhuru (19,340 Ft/ 5,895 M) ~ Horombo Hut (12,200 Ft/ 3,720 M)
Your trek starts with an ascent with far-reaching panoramic views, walking into the climatic zone of the upland desert and on the lava ridges beneath the glaciers of the western breach. You will reach the distinct pinnacle of the lava tower (4640 m), our high point for the day and a great place to enjoy your lunch. In the afternoon we make a steep descent to our camp for the night, located in the base of the great Barranco valley (3960 m), sheltered by towering cliffs but with extensive views of the plains below.
Day 5: Barranco Camp (3960M) to Karanga Camp (3963M)
Our day starts by descending into the start of the Great Barranco, a huge ravine. We then exit steeply, up the Great Barranco Wall, which divides us from the southeastern slopes of Kibo. It’s a climb over rock, not technical but long and tiring. Passing underneath the Heim and Kersten glaciers, we head towards the Karanga valley. From here we have a steep climb up from Karanga valley to our night’s camp at Karanga camp, set at 3963m. For those feeling strong, we will go for a mid-afternoon acclimatization trek up to around 4200m before descending back to camp for the night.
Day 6: Karanga Camp (3963) to Barafu Camp (4640M)
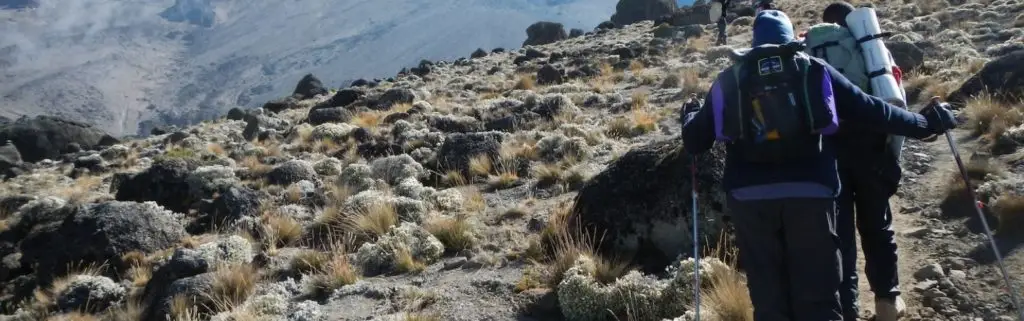
After a good night’s rest and breakfast, we set off on our walk to Barafu Camp at 4640m. The climb will take us across desolate scree slopes with no vegetation around us at all. It’s a tough steep walk made more difficult by the altitude. On arriving at camp, we eat and spend the afternoon resting as we prepare for a long night and day ahead. It is important to keep hydrated and warm. We have an early dinner and then try to get some sleep as we will be getting up between 11 pm and 12 pm to start the climb to the summit.
Day 7: Barafu Camp (4640M) To Crater Camp (5,790M)
Wake before dawn to start your summit approach. You’ll reach the Uhuru Peak in the early afternoon when a few groups are around. A short descent brings you to Crater Camp, set in soft sands near the famed Furtwangler Glacier. Crater camp is not a route in its own right but a challenging extension that in principle can be added to any route. It involves sleeping overnight in the bowl of the crater. An amazing experience enjoyed by only a few of the most adventurous climbers.
Day 8: Crater Camp (5,790M) to Uhuru Peak (5895M) to Millennium Camp (3790M)
In the morning after early breakfast, we begin our descent by returning to Stella’s point and then descending on a scree slope passing Barafu Camp for a short break before heading down to Millennium Camp for a long well-earned rest.
Day 9: Millennium Camp Mweka Gate 13KMS
Covering the last section of the mountain, the trek continues down through the forests to the gate where your vehicle will be waiting for you for the transfer to Arusha as per your schedule and budget. Remember to tip your guides, cooks, and porters, since you will be leaving them here. where it is time for celebration.
Price
PAX
1 PAX
2 PAX
3 PAX
4 PAX
5 PAX
6 PAX
Price
on request
on request
on request
on request
on request
on request
Inclusions
Safety Equipment:
Professional Mountain Guides, all head guides (at least 1 per trip) currently certified by NOLS USA as WFR (Wilderness First Responder)
Park Fees
Campsite fees
Emergency Rescue Fees
Camping equipment and other gears:
Mountain Meals
Transfer from the hotel to the starting point
Transfer from the last point to the hotel
Exclusions
Accommodation upon arrival and last day
Tips for a mountain guide, recommended 15-20 per group per day